Today I added an LED backlight to my square gauge. I really like how light leaks from the grills at the top and bottom of gauge.
I decided not to use RGB LEDs in this build due to size and pin-count constraints. The white LED was originally part of a solar-powered LED light string.
These are side-emitting LEDs by virtue of a conical indent in the tip of the lens that refracts much of the light sideways. I tried grinding back the lens and using blobs of hot-glue to make the lighting more diffuse, but in the end I wasn’t convinced it was an improvement, and so the simpler design won out.
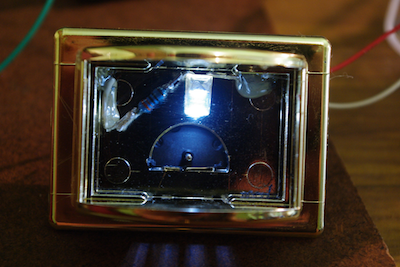
I soldered the 330Ω current-limiting resistor to the LED. I trimmed the leads on the LED and resistor really short to get it all to fit. I would have liked the resistor tight against the wall to prevent a dark spot, but it didn’t work out that way.
The holes for the connection wires had to be drilled right in the extreme inner corner to avoid the stepper motor on the back. The cathode wire goes to a PWM pin on the Arduino, and the anode to ground. I recently added LED control options to the Gaugette software to control the brightness.
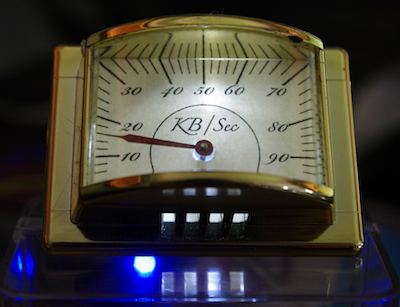
 ZOMG, now this gauge totally looks like the
helmets worn by the Viper pilots in the original 80’s
Battlestar Galactica series!
ZOMG, now this gauge totally looks like the
helmets worn by the Viper pilots in the original 80’s
Battlestar Galactica series!